8 min read
How Product Teams Turn a Feature Walkthrough Into a 30-Second Clip
Turn a feature recording into a 30-second product walkthrough video. Use a timed script, trim distractions, highlight the action and check your export.
- how-to
- product-teams
- screen-recording
- video-editing
KEY TAKEAWAYS
- Build the clip around one visible result: a complete feature tour usually needs more than 30 seconds.
- Use a five-part script: problem, starting state, action, result and next step.
- Cut setup and repeated attempts, then check that the remaining clicks still explain how the result happened.
- Review the exported video at its actual viewing size, with sound off as well as on.
Your team has shipped a useful feature. The recording announcing it begins with a login, a search for the right workspace and an explanation of three related settings. The useful part starts a minute later.
A short product walkthrough video gives that feature one clear story: here is the task, here is the action, here is the result. Thirty seconds is a useful constraint for a release note, an onboarding message or a short launch clip. It is an editorial target, not a proven optimum for every audience.
This guide turns a longer recording into that focused clip. The worked example is a fictional project app with saved filters; the recording and editing workflow uses the available FramioCam Chrome extension.
Choose the job before choosing the footage
Write one sentence describing what the viewer should understand after watching:
Save a filter once, then reopen the same view without rebuilding it.
That is specific enough to guide an edit. “Introducing our new dashboard” leaves room for every panel, metric and preference to wander into the video.
Decide who is watching, too. Existing customers may already recognize the Projects page. New users may need a brief explanation of what a saved view does. A clip for both audiences can become confusing because it skips prerequisites while explaining things experienced users already know.
Use this test: can you show the promised result and the essential action in one short sequence? If the answer needs a permission change, an integration setup and a second user’s approval, make a longer tutorial or split the explanation into several clips.
A 30-second product walkthrough video script
Plan the final sequence before trimming the source. These timings are a starting template; read the narration aloud and adjust them to the actual interface.
| Time | What the viewer sees | Example narration or on-screen text |
|---|---|---|
| 0–3 seconds | A project list with the repetitive task identified | “Checking the same projects every morning?” |
| 3–7 seconds | The relevant filters already selected | “Choose the filters you use most.” |
| 7–17 seconds | Save view, enter a name, confirm | “Save this view as My active projects.” |
| 17–25 seconds | Switch away, then reopen the saved view | “Next time, open it from Saved views.” |
| 25–30 seconds | The restored list and one next step | “Try it with the projects you check every day.” |
The return visit is the proof. Ending immediately after Save shows that a button works; reopening the view shows why the feature matters.
Keep narration tied to visible actions. If the sentence describes a result the screen has not reached, the viewer must hold that explanation while waiting for the interface to catch up. Shorten the sentence or give the action more time.
Record a clean take, or find the useful sequence
For a fresh recording, prepare a demo account with fictional names and believable sample projects. Open the starting page, dismiss unrelated notifications and rehearse the path once. Use browser zoom to make the controls readable before recording rather than relying on a large export to fix tiny text later.
In FramioCam, choose the source that covers the workflow. A tab suits a feature that stays on one web page; a wider capture is useful when another window is essential. Check the microphone with a short test if you are narrating. The recording guide covers source selection, microphone settings and pause controls.
For an existing walkthrough, watch it once and note the source timestamps for the starting state, the decisive action and the result. Keep those notes separate from the planned final timings. Removing twenty seconds near the beginning changes the finished timeline, but it does not change where the original action happened.
If the source never demonstrates the result, record a pickup. A caption saying “and now it works” cannot replace showing it.
Make the first edit about sequence
Open the recording in the editor and remove the material outside the story. Trim the beginning past the setup and the end after the result has had time to register.
For a mistake in the middle, split before it and after it, then remove the unwanted piece. Ripple delete closes the gap; a plain delete can leave an empty interval. Play across the join after every substantial cut. The video editor guide explains the timeline and cut controls.
Three checks catch most confusing edits:
- Starting state: can the viewer tell which page or object is being edited?
- Causal action: is the click or input that creates the result still visible?
- Result: does the final state stay on screen long enough to inspect?
Cutting repeated navigation is usually helpful. Cutting from an empty field to a finished view can hide the very step the viewer needs. If a slow operation must be shortened, label the skip rather than implying that the product completed it instantly.
Direct attention where it helps
Once the sequence makes sense, decide whether the viewer needs help finding a small control. A restrained zoom, a brief arrow or a short text label can do that. Keep the wider context visible before and after the close-up so the viewer knows where the action belongs.
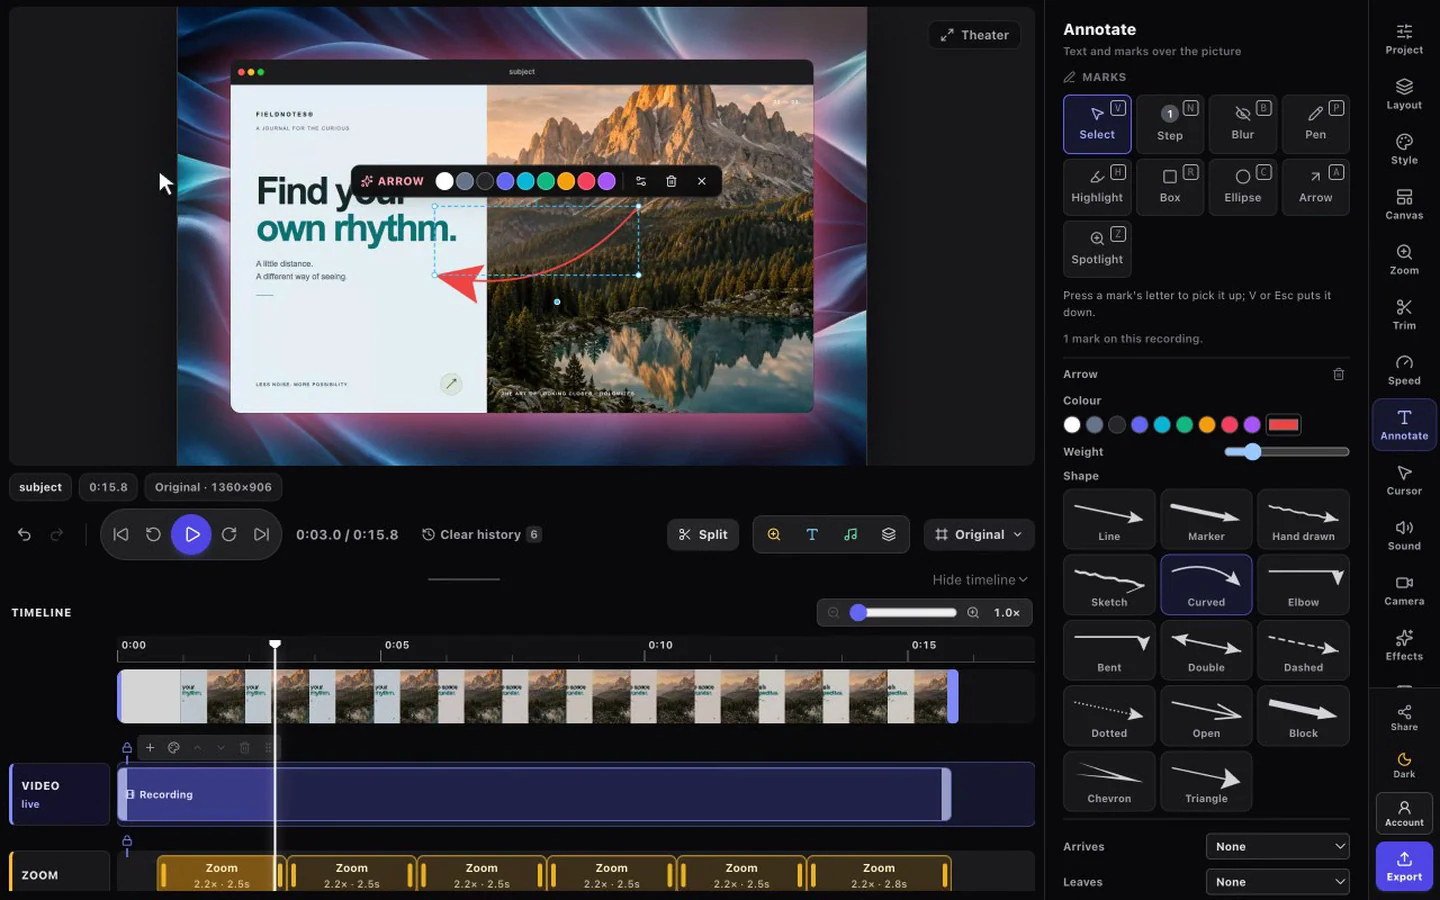
Click-driven zooms depend on click data captured with the recording. Imported footage may not contain it, so review the available controls rather than expecting every imported video to generate the same effects.
Choose a simple frame and backdrop if they help the video sit neatly in a release note. Leave enough room for the interface. A decorative border that makes the button unreadable has made the clip less useful.
For screenshot artwork accompanying the announcement, use the separate screenshot mockup guide; the video does not need to carry every visual asset for the launch.
Make the explanation work without sound
A release-note reader may watch without audio. Include enough visible context to communicate the feature’s purpose, and provide accurate captions when narration carries information the viewer needs.
W3C’s caption guidance explains that captions synchronize speech and meaningful non-speech audio with the video. Review automatically generated captions for accuracy, especially product names and negations. A headline or an arrow is useful visual guidance, but it does not transcribe spoken instructions.
For the Chrome workflow here, arrange captions in your destination platform or captioning workflow where needed. The native Mac app’s planned transcription features are separate from the available Chrome product.
Export for the place people will watch
Check the destination’s accepted format and size before exporting. Choose MP4 when the destination accepts it and your device and plan offer it. A GIF can suit a silent visual loop, but it cannot carry the narration from this example.
FramioCam’s Chrome Free plan includes unlimited video exports up to 720p with a FramioCam watermark on Studio exports; a free account enables video export. Chrome Pro removes that watermark and offers exports up to 4K. See the current plans for format and licence details. Exporting above the source resolution cannot recover missing detail.
Open the downloaded file and check it at the width it will occupy in the release note or message. Watch once with sound, once without, and pause on the smallest important label. Check the first and last frames, too: they should not show the recorder setup or a cursor reaching for Stop.
Captures and editing stay local; uploading the final clip to a course platform, social network or your chosen cloud storage is a separate sharing action. The media privacy explanation describes that boundary.
Publish with one useful next step
Put a short explanation and a relevant action beside the clip: “Save your first view from Projects.” Link to the feature or its documentation rather than sending an existing customer back to a general homepage.
For a buyer’s question after a sales call, use the personalized sales demo guide. It includes a longer worked example, a follow-up email and checks for who can open the recording.
Keep the source recording, the short script and a note of the product version shown. When a label changes, those materials make it easier to replace the affected section.
Measure what the clip was meant to help: opening the guide, reaching the feature or completing its first use. Views alone do not establish feature adoption. If those events are not instrumented, start with a simple comprehension check: can a colleague who did not make the video explain the action and the result?
FAQ
How long should a product walkthrough video be? A focused feature announcement can fit into roughly 30 seconds. A tutorial should take the time needed to explain prerequisites, actions and results. Use a longer video or several focused clips when shortening would hide essential steps.
What should a 30-second product demo include? Show the problem, the starting state, the essential action, the result and one next step. Give the result enough screen time for the viewer to recognize what changed.
Can I turn an existing screen recording into a short product clip? Yes. Find the useful sequence, trim the ends and split out mistakes or unrelated sections. Review each join so the shortened recording still explains how the action produced the result.
Do I need a webcam for a product walkthrough? No. Use a webcam when the presenter’s presence helps the explanation. Leave it off or reposition it when it covers the interface or competes with the action.
Try FramioCam for Chrome, then follow the video editor guide to turn one real workflow into a clip worth sharing.